Intro
Are you an Apple Developer? Most of the Apple Admin Community have developer accounts for the simple reason of gaining access to beta releases earlier than the public. This extra times allows us to test for changes that might affect the environments we support before it ends up in the hands of our users. Up until this point that is the only reason I could justify having a Dev account. Recently I found out that being a developer gives you the access to sign packages using a secure certificate from Apple, which I will document below.
As of October 24th, commit 4d270a0 of the Luggage project, packagemaker is no longer a requirement!! A pretty big deal since packagemaker has not seen an update since the late days of Snow Leopard. This update to Luggage, makes use of Apple’s built-in pkgutil command to build native OS X packages. For quite some time you could force Luggage to use pkgutil but this required adding PKGBUILD=1 to the top of every Makefile.
Luggage allows us to create packages that meet the following requirements:
- repeatability
- mobile
- sharable
- easy incremental versioning
The Setup
The above is fantastic news and it lays the groundwork for Luggage to sign packages. Honestly, pkgutil is doing all of the hardwork behind the scene but I found documentation on using Luggage to sign packages spread all over. The goal below is to document the process of signing a package from start to finish.
Info
Note: Apple recommends requesting a certificate via Xcode and while it is quite possible, and much easier, I found that the certificate generated via Xcode is only valid for 365 days. Doing it the manual method below creates a certificate valid for five (5) years.
Obtaining the certificate
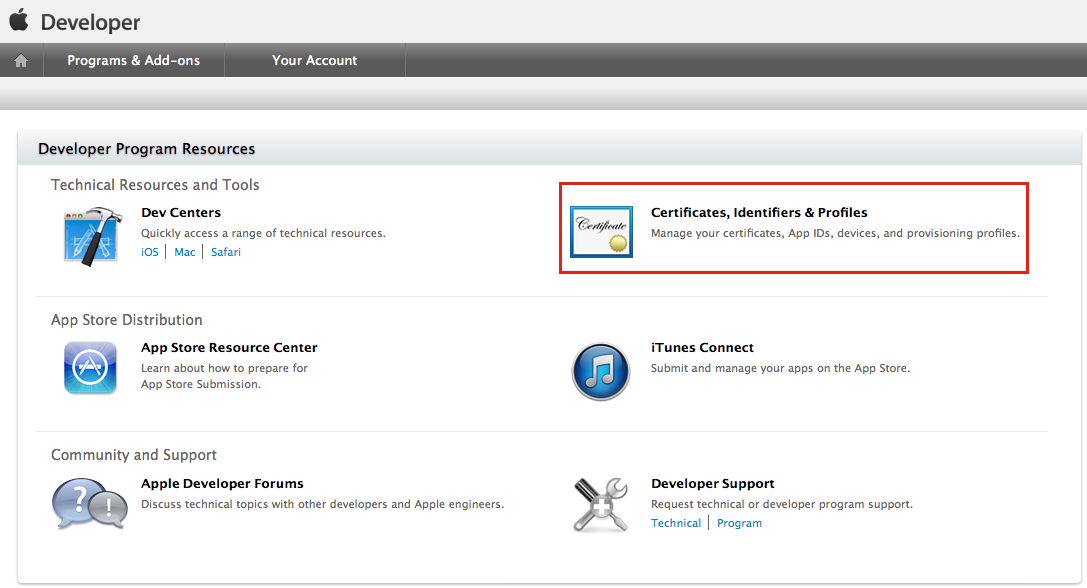
Visit the Apple Developer page and login via the Member Center link (top right).
Click the on the certificates section.
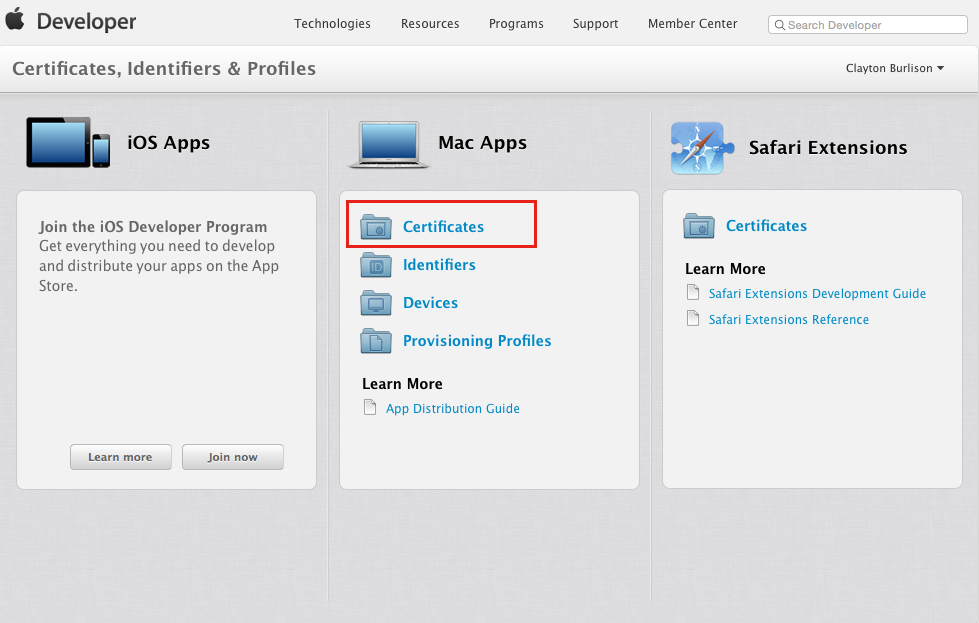
Click on the Mac certificate section.
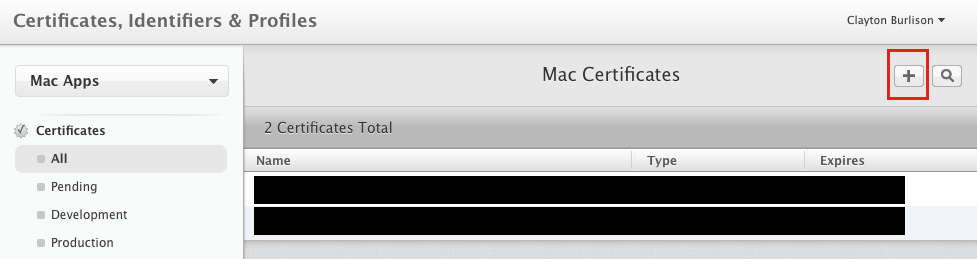
Create a new certificate from the plus (+) button.
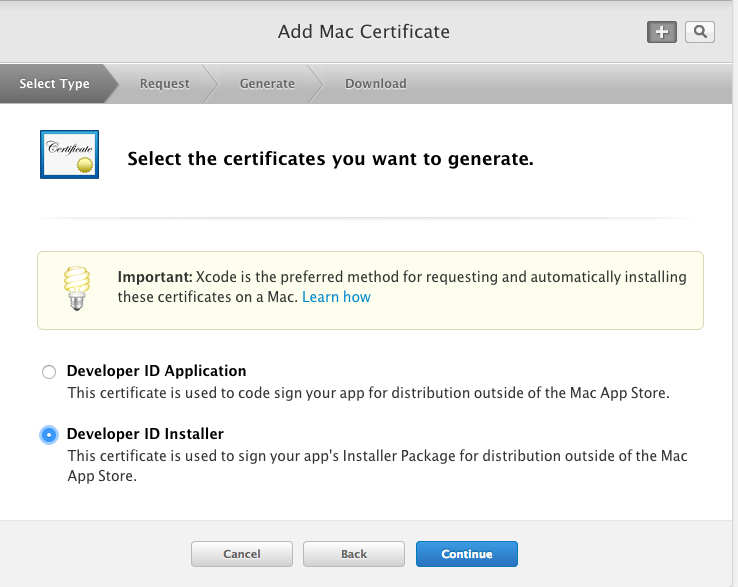
Create a new Developer ID.
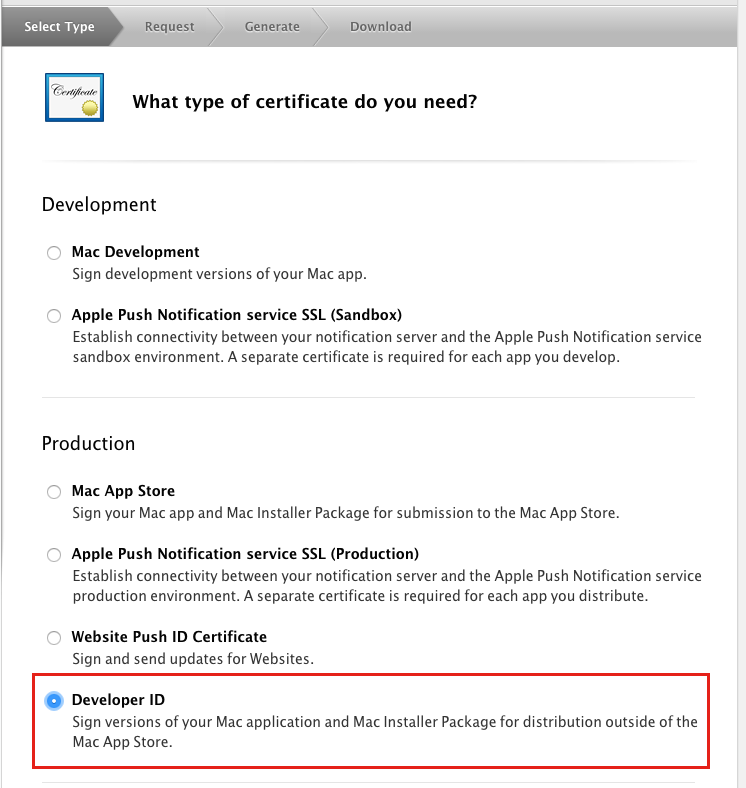
Create an “installer” certificate to use with Luggage.
The steps on this page explain how to create a certificate signing request (csr). I will detail the steps in following images. For now just open “Keychain Access”.
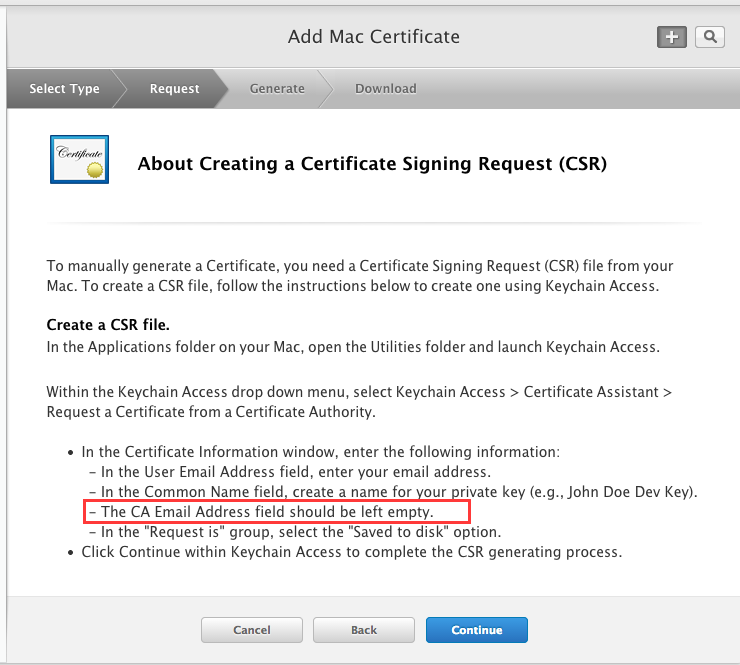
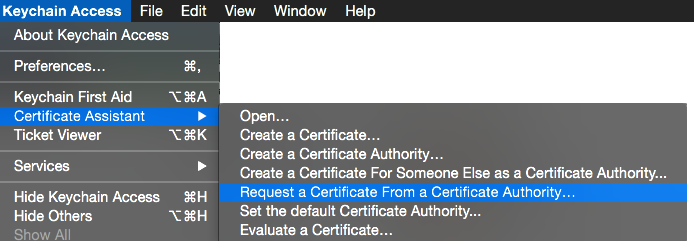
Keychain Access > Certificate Assistant > Request a Certificate from a Certificate Authority…
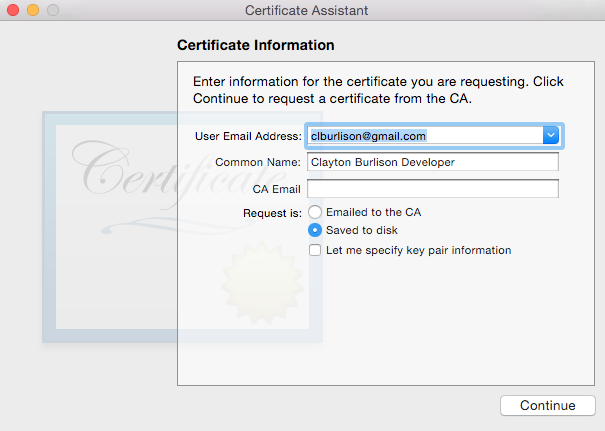
Fill in the Email address and Common Name.
Warning
Note: Do not fill in the CA Email per Apple’s instructions.
After the CSR is created upload to Apple’s website.
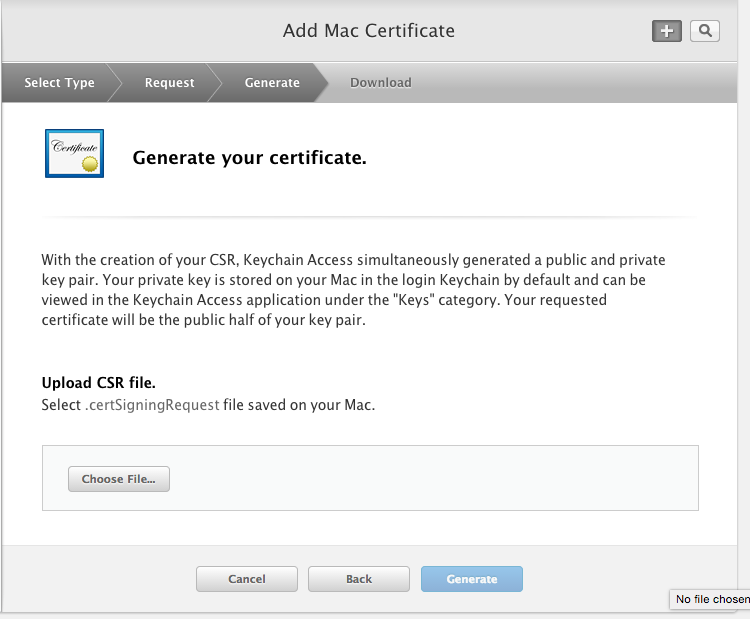
Generate the certificate.

Download your newly created certificate.
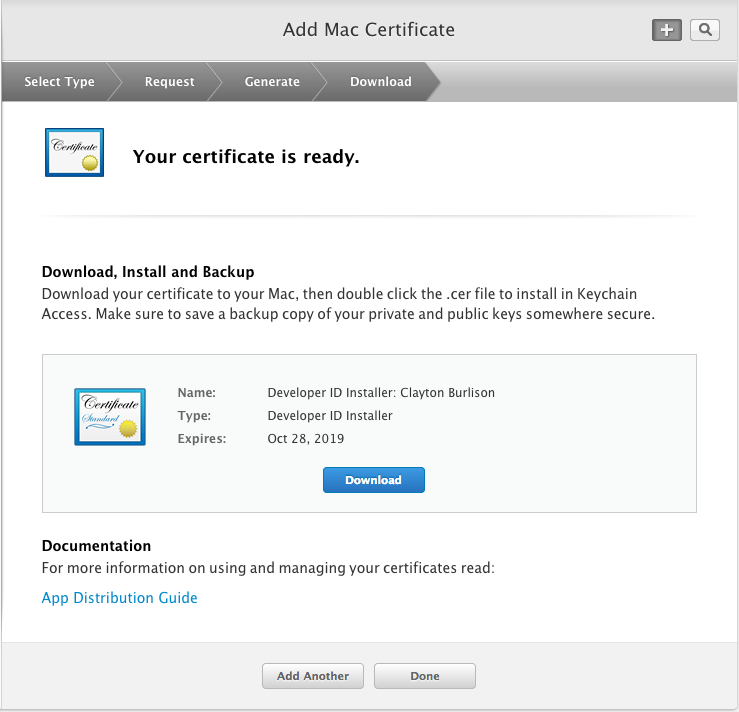
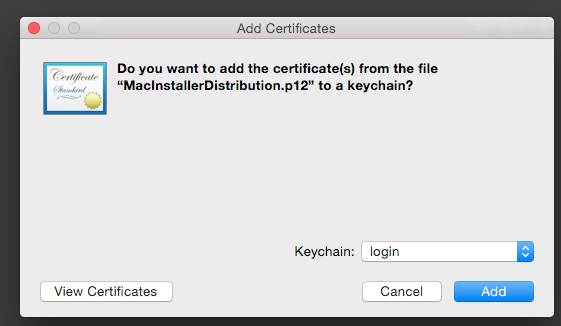
Double click your cert to install into your keychain. (I choice to install to my login keychain)
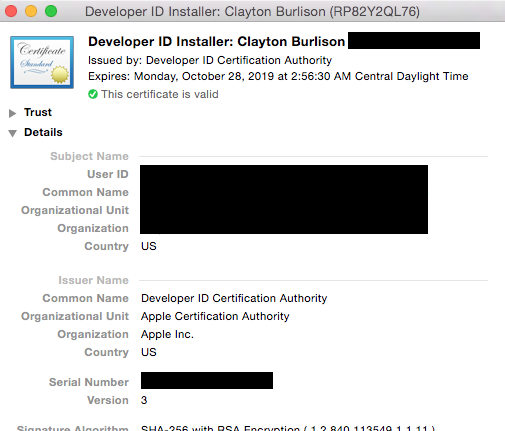
For reference my certificate looks like the below.
Create a signed package
Great we have a newly created certificate ready for us to use. Now we need to sign a package and what better package to sign then luggage itself.
If you already have the Luggage downloaded simply change directory into the project directory. Else download it with git using the following.
git clone https://github.com/unixorn/luggage.git /your/luggage/path
cd /your/luggage/path
If by some chance you have made it this far without actually installing luggage run the following
make bootstrap_files
Now lets make a non-signed package with luggage, that installs luggage (meta enough for ya), run the following:
make pkg
Rename the package to luggage-no-sign.pkg. We are doing this for comparisons later.
To tell luggage to sign the package you need to add the following line of code inside of the Makefile at the beginning. Make sure to change the information in the double quotes with the name of your certificate (review image 11 above).
PB_EXTRA_ARGS+= --sign "Developer ID Installer: Clayton Burlison"
If you are lost on where to add the code in the Makefile see the sample below:
<----------------
#
# Sample package that packages luggage.make and prototype.plist

include luggage.make
PB_EXTRA_ARGS+= --sign "Developer ID Installer: Clayton Burlison"

TITLE=luggage
REVERSE_DOMAIN=net.apesseekingknowledge
PAYLOAD=pack-luggage.make pack-prototype.plist \
	pack-usr-local-bin-app2luggage.rb

help::
	@-echo
	@-echo "Installation"
	@-echo
	@-echo "To copy luggage's files to /usr/local/share/luggage: make bootstrap_files"
---------------->
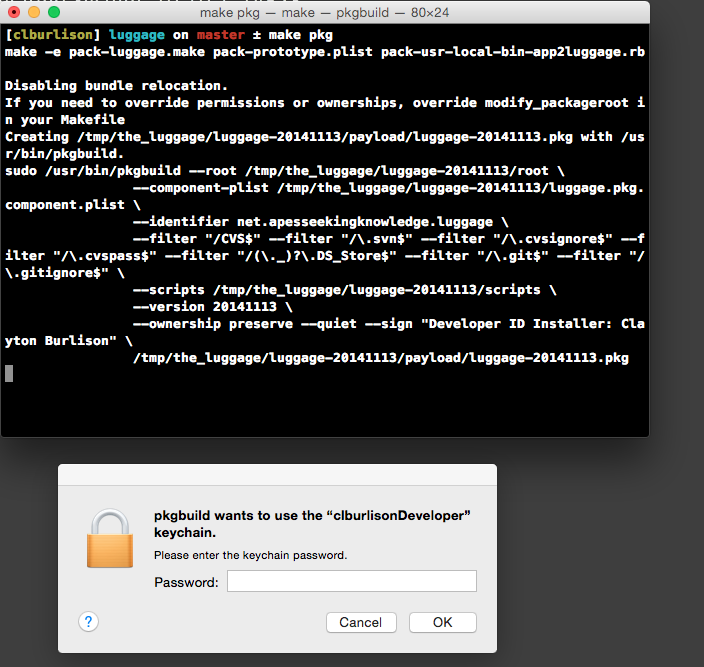
Lastly, lets create the signed package.
make pkg
If your login.keychain is locked or you decided to put your cert keys in a separate keychain you will see the following pop-up below. Simply type the password associated with that keychain to allow pkgutil to sign the package.
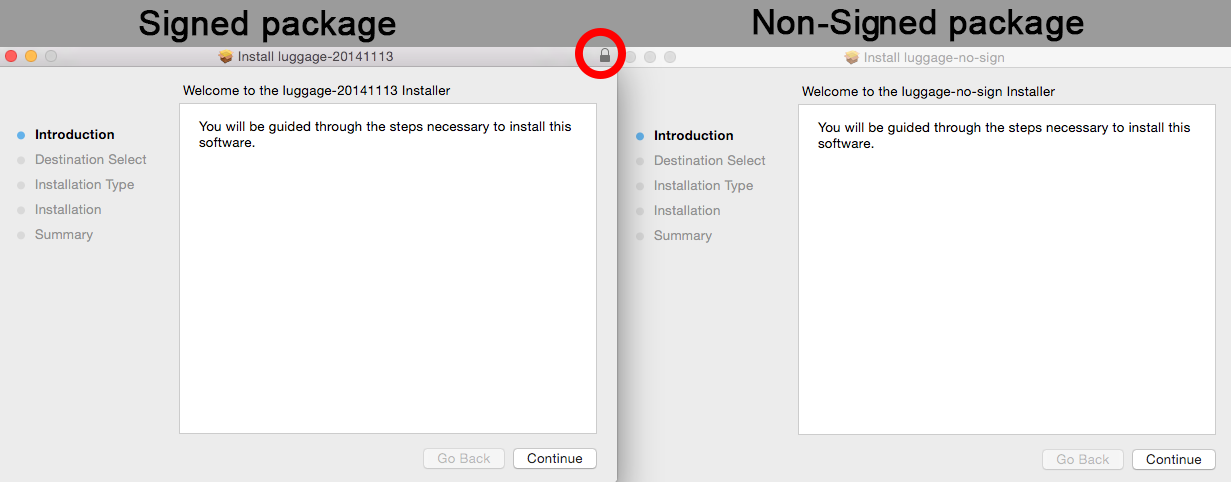
Notice below the visual lock on the signed package. This package will be trusted with Gatekeeper using the default settings.
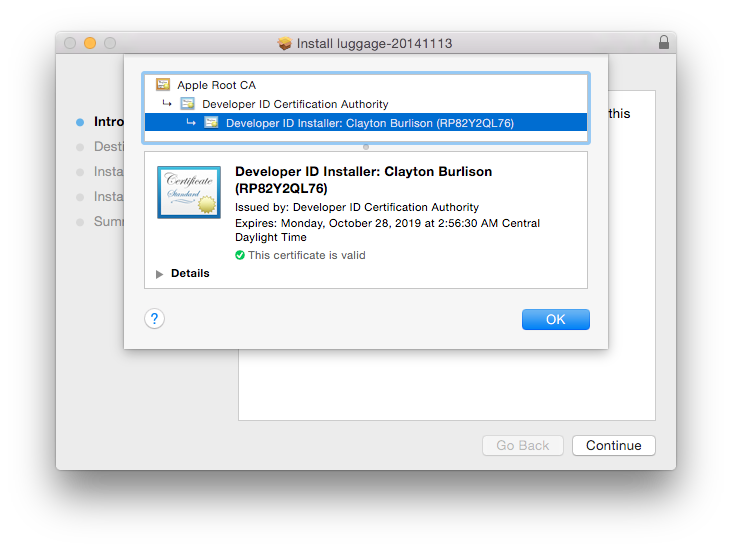
If you click on the lock while in the installer window you can get details about the certificate used to sign a package.
Pkgbuild vs PackageMaker
If you have any Makefiles using postflight scripts they will need to change the script type to postinstall. This is a requirement from using pkgutil.
Conclusion
Signing packages might seem like a great idea. Lets sign all the packages….but wait. Think of the reasons you are doing it first. It might make sense to not sign packages. For example, if you are creating packages that are only ever going to be ran in Munki, it is not a requirement for that package to be signed. If your certificate expires, you will need to recreate a new package. If however you want to distribute packages to you end-users via the internet it might be company policy or best practice to sign packages. Just wanted to give warnings.
Random Note
In the update to 10.9.5 - Gatekeeper was re-enabled. Seems Apple is really wanting to beef up their security game.
Articles:
Productsign,
Luggage,
Pkgbuild vs PackageMaker